

Manage assets
Assets lets you manage the current site’s Webflow asset library from Wicked CMS. You can work with images, documents, and other files.
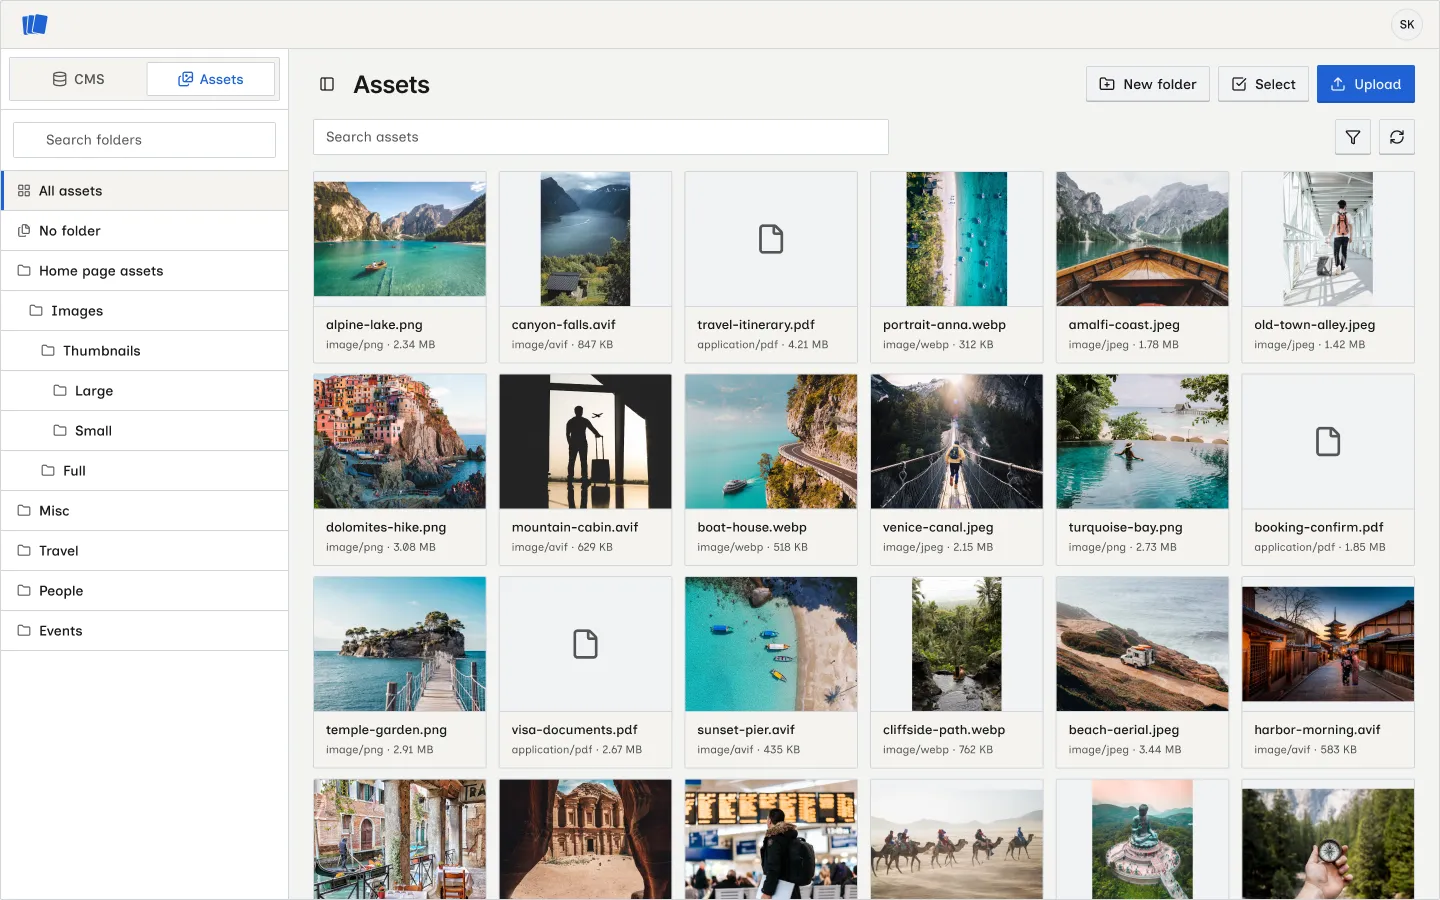
Open Assets from the site section switcher in the sidebar.
Browse folders
The Assets sidebar lists:
- All assets: every file on the site
- No folder: files that are not in a folder
- Nested folders from your Webflow asset library
Click a folder to show its contents in the grid. Use Search folders above the list to filter the tree by name. Child folders appear as cards in the main panel. Click one to open it.
Search and filter assets
In the Assets toolbar:
- Type in Search assets to filter by name
- Click Toggle filters to filter by File type (Images / Files), File format, or Alt text
- Click Reload assets to refresh the library from Webflow
Search and filters work together. Assets must match both.
Upload assets
Choose a destination
Select the folder where the file should go. In All assets or No folder, uploads are unfiled.
Create a folder
Click New folder, enter a Folder name, and click Create. The folder is created inside the location you have selected (or unfiled when you are on All assets or No folder).
Edit asset details
Click an asset card to open the detail sheet. You can:
- Edit Display name
- Edit Alt text (images)
- View File name, Type, Size, and Dimensions
- Download, Save, or Delete the asset
Changed fields highlight until you save. Closing with unsaved changes prompts you to keep editing or discard.
You can update the display name and alt text. To replace a file, upload a new one.
Delete assets
- From the detail sheet, click Delete and confirm
- Or click Select, choose assets, then Delete
Deleting removes the file from the Webflow asset library. CMS items that still reference it may break.
Permissions
Uploading, editing, and deleting require Webflow assets:write access. If your connection is missing it, Wicked CMS shows a message with Reconnect Webflow. See Manage your Webflow connection.