

Product updates and release notes for Wicked CMS
Crop, resize, and convert images
Adjust images before adding them to an item, or edit images already in a field.
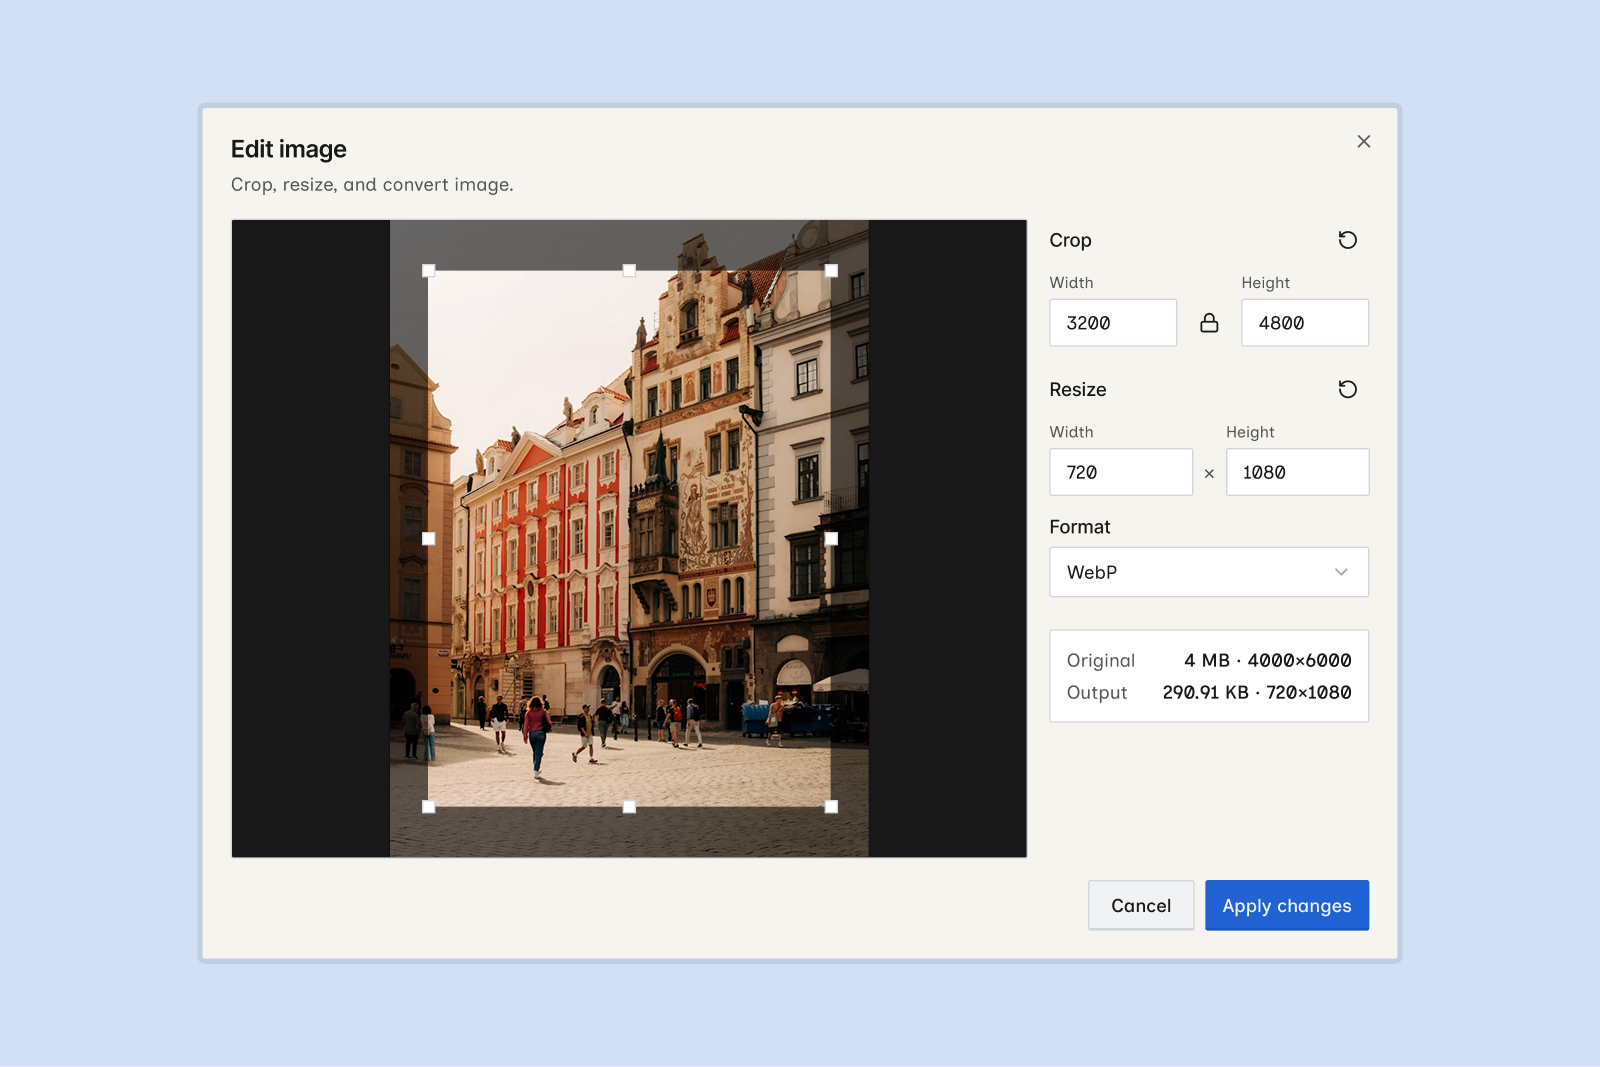
What’s new?
- Edit image opens when you upload or replace an image in an Image or rich text field. Crop, resize, or convert the image, then click Apply changes.
- An Edit button (pencil) appears on existing images in Image, Multi-image, and rich text fields. It reopens the editor without replacing the file.
- Crop with draggable handles or width and height inputs. Lock or unlock the aspect ratio, or click Reset crop.
- Resize the output up to the crop size, or click Reset to crop size.
- Format offers Keep original, WebP, and JPEG. WebP and JPEG have a Quality slider.
- The Original and Output summary shows file size and dimensions before you apply changes.
- Images over 4 MB in Multi-image fields open the editor automatically so you can compress them first.
- Edited images are saved to the item when you Save or Publish.
How to edit an image
Add or select an image
In an Image field, click Upload or Replace. In a rich text field, use the toolbar to insert an image. To edit an image already in the field, click Edit (pencil).
Adjust the image
In the Edit image dialog, drag the crop handles or enter crop dimensions. Set output size under Resize if needed. Choose a Format and adjust Quality for WebP or JPEG.
To add an image without changes, click Apply changes with the default crop and format. You can also paste a link or paste from your clipboard when uploading. See Upload images from a link or clipboard.